Showing posts with label Clover Light. Show all posts

You've Been Preparing English Breakfast Muffins WRONG

Probably not all of you, but I'd hazard a guess and say most of us have been preparing English Breakfast Muffins incorrectly for years!

Bold statement that - but if you use a knife to cut open your muffins, then you have been doing it wrong...

I've been enjoying English Breakfast Muffins for years and up until recently I have always used a knife to cut them open:

Sometimes I would try and use a zig-zag pattern with the knife to try and replicate how they look at McDonalds but no matter what I did they didn't look quite the same and you couldn't put too much butter on your muffin as a lot would just drip off the sides.

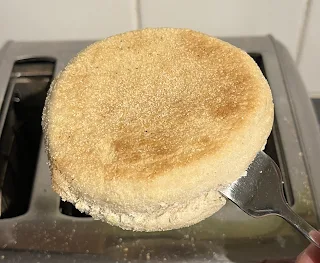
The one day whilst watching the Backyard Chef on YouTube I say him using a FORK to split a muffin in half!

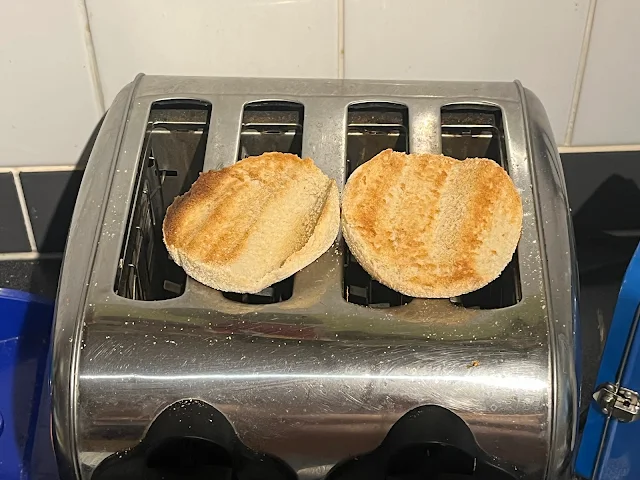
From this point onwards I have always used a fork to split my muffin in two and it's a game changer for sure!


Not quite as quick as using a knife but much more enjoyable this way.


Served with lashings of butter using the fork method to split your muffin is the most delicious way to eat them!

So, why don't they tell you this on the packaging, well they sort of do and don't - although on the packet I have, it doesn't explicitly say to use a fork (or not to use a knife) it simply says "Split the muffin in half" rather than "cut" it in half.


Ninja Pressure Cooker Beef Brisket Recipe


Portions: 2


Ingredients

  • 600g Beef Brisket
  • Beef Stock Cube
  • 500ml Water
  • Small Onion

Equipment

  • Electric Pressure Cooker (Ninja Foodi with the Pressure Cooker Lid)
  • Wooden Spoon
  • Tin Foil

Instructions

  1. Add the stock cube to 500ml of boiling water and stir until it has dissolved and add to the Pressure Cooker pot
  2. Finely chop the small onion and add to the pot
  3. Place the Beef Brisket in to the Pressure cooker
  4. Set the Pressure Cooker on HIGH for around 60 minutes (depending on how thick the joint is) - if cooking from FROZEN then set the time for around 1hr 20mins.


  5. Remove the Brisket from the pot and set aside in tinfoil


  6. Switch to Sear/Saute mode and stir the remaining mixture


  7. Add gravy granules (or a cornflour/water mix) to thicken the gravy and continue stirring


  8. When the gravy is done to your liking, serve and enjoy!


Serving Suggestion(s)

Serve with mashed potato and veg.


Easy Garlic Butter Mussels Recipe


Portions: 1


Ingredients

  • Handful of Frozen Shelled Cooked Mussels
  • Onion (very finely chopped)
  • Butter
  • Garlic
  • Dried Parsley

Equipment

  • Chopping Board
  • Sharp Knife
  • Frying Pan

Instructions

  1. Add a large knob of butter to the frying pan and add a generous amount of garlic
  2. Add the finely chopped onion to the frying pan over a moderate heat - as the onion is so fine it wont take long to soften
  3. When the onion has softened and the butter starting to bubble, add a sprinkling of parsley
  4. Add in the mussels and gently stir over a medium heat for approx 5-7 minutes until the mussels are piping hot and nice and soft


Serving Suggestion(s)

Serve with crusty bread or a nice rustic bread roll.


Pressure Cooked Frozen Chicken Legs and Veg with Onion Gravy in a NinjaFoodi


Portions: 2


Ingredients

  • 2 Chicken Legs
  • Carrots & Other Veg (I'm using mushrooms and mini corn cobs)
  • Asparagus
  • Butter
  • Garlic
  • Small Onion (finely chopped)
  • 500ml of hot water
  • Gravy Granules

Equipment

  • Electric Pressure Cooker (I'm using a Ninja Foodi)
  • Small pan for the gravy
  • Frying Pan
  • Wooden Spoon
  • Sieve

Instructions

  1. Mix to small teaspoons of Chicken Gravy Granules in to 500ml of water and pour in to your pressure cooker bowl


  2. Place your (Frozen) Chicken Legs in to the pressure cooker


  3. Set the Temperature to High and the Time to 15 minutes


  4. Prepare whatever vegetables you fancy for you meal


  5. If you're having some Asparagus then wait until there is 5 minutes cooking time left and then add the butter, garlic and Asparagus to the frying pan and start to cook it


  6. When the time is up on the pressure cooker, stop the cooking and release the steam!


  7. Remove the chicken breasts from the Pressure Cooker and put to one side


  8. Add your vegetables to the Pressure Cooker


  9. Either add the Chicken Legs back in to the Pressure Cooker to finsish them off or if like me you like the skin crispy, wrap them in tin foil to keep them warm and then crisp them up in the air fryer function.

  10. Set the Pressure Cooker temperature to High and set the Time for 3-4 minutes (depending on how soft you like your veggies)

  11. When the time is up, release the steam!  Then strain the vegetables over a saucepan.


  12. Keep the veggies that you have just strained warm (I put them in a dish/bowl with a bit of tin foil on the top)

  13. Add the chopped onion to the saucepan and heat up to a gentle simmer


  14. The onions will slowly start to soften.  Check the consistency of the gravy and add more Gravy Granules until it is at the thickness you prefer


  15. When the onions have softened and the gravy is nice and thick, you are ready to dish up!


  16. Serve and enjoy!

Serving Suggestion(s)

Check the finished dish out on TikTok:
@thesolochef_official

What's for tea today?! I love my #NinjaFoodi #PressureCooker and can't believe how quick it easy to cook things (even from frozen) and how delicious they are! #TheSoloChef #Ninja #WhatsForTea

♬ original sound - TheSoloChef


How Long Do I Cook Roast Beef Joint for in a Ninja Foodi Pressure Cooker Setting

250g beef joint for 20 minutes on High for Well Done.


After the cooking time, remove the beef, wrap in tinfoil and leave to rest.


Add your vegetables to the stock already in the Ninja Foodi and Pressure Cook for 3 minutes.


When the 3 minutes is up, place a sieve over a saucepand and carefully pour in the stock which you can now turn in to gravy!


Instead of using cornflour to thicken my gravy I always use Bisto Gravy granules to add flavour and thicken it.


MMmmm!  Delicious!  See it on TikTok below:

Homemade Bacon and Duck Egg Muffin

Trying out my new frying pan (again) this morning:


Homemade Liver and Bacon with Onions Recipe


Portions: Two


Ingredients

  • 225g Lambs Liver
  • 2 TSP Plain Flour
  • 40g Butter
  • 1 Medium Onion
  • 3 Slices of Bacon chopped up in approx. 2cm squares
  • 250ml Beef Stock
  • 1 Squeeze of Tomato Puree
  • Salt and Pepper
  • Gravy Browning
  • Mashed Pototoes


Instructions

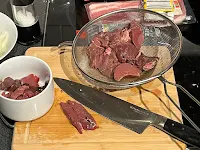
  1. Rinse the live under a cold tap (I use a sieve so you don't lose any down the sink)


  2. Dry the rinsed liver with some kitchen towel and put to one side in a bowl
  3. If not already sliced, slice the liver in to strips and trim off any bits you don't want
  4. Put the flour in a bowl and add a sprinkling of salt and pepper and give it a stir


  5. Add the sliced liver to the flour mix and lightly coat it


  6. Melt half of the butter in a frying pan and add the liver (ensure you tap off any excess flour as you'll need this later)


  7. Fry the liver for 1-2 minutes a side and then place on a plate for later
  8. Add the rest of the butter to the frying pan
  9. Add in the onion and gently fry until golden and soft


  10. Add the chopped up bacon to the pan and gently fry for around 5 minutes (we're looking for soft bacon not crispy)


  11. Pour in the hot stock and bring to a simmer


  12. Add a squirt of tomato puree
  13. When the stock has turned in to a thick gravy add a (very) tiny amount of gravy browning


  14. Now add the liver and cook gently for 2-3 minutes until it's nice and hot


Serving Suggestion(s)

Liver and Bacon with Onions goes fantastically well with simple mashed potato but I had some frozen Rumbledethumps in the freezer so I cooked that in the microwave and served it with that!